 Site view
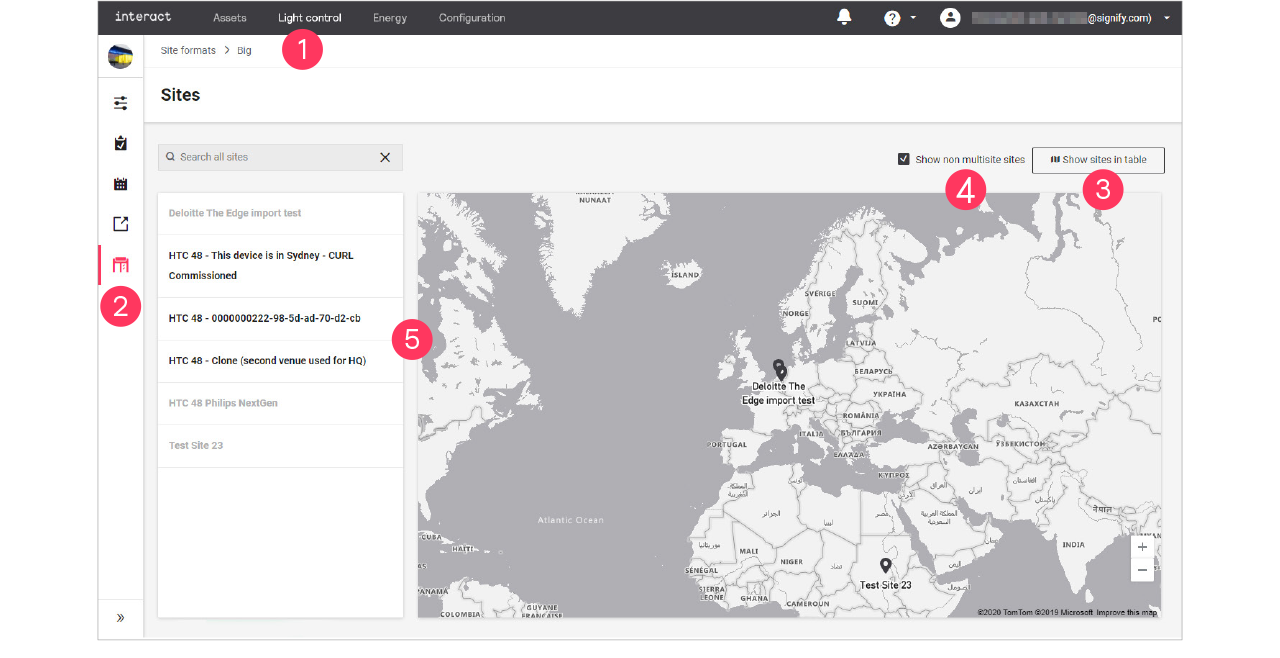
The site view gives you an overview of the current status of the site you are viewing. Also, some generic site settings can be made on this page. The site view consists of the following sections:
-
Overview
-
Scenes
-
Setting
To enter the Site view:
-
In the menu, click Light control.
-
Click Sites (
 ).
). -
Click
 Show sites on map or Show sites in table to toggle the view.
 -
Optionally, selecting the Show non multisite sites checkbox to show all sites.
-
Select the site you want to view or edit.
| Non multisite sites are not selectable. |
Overview
-
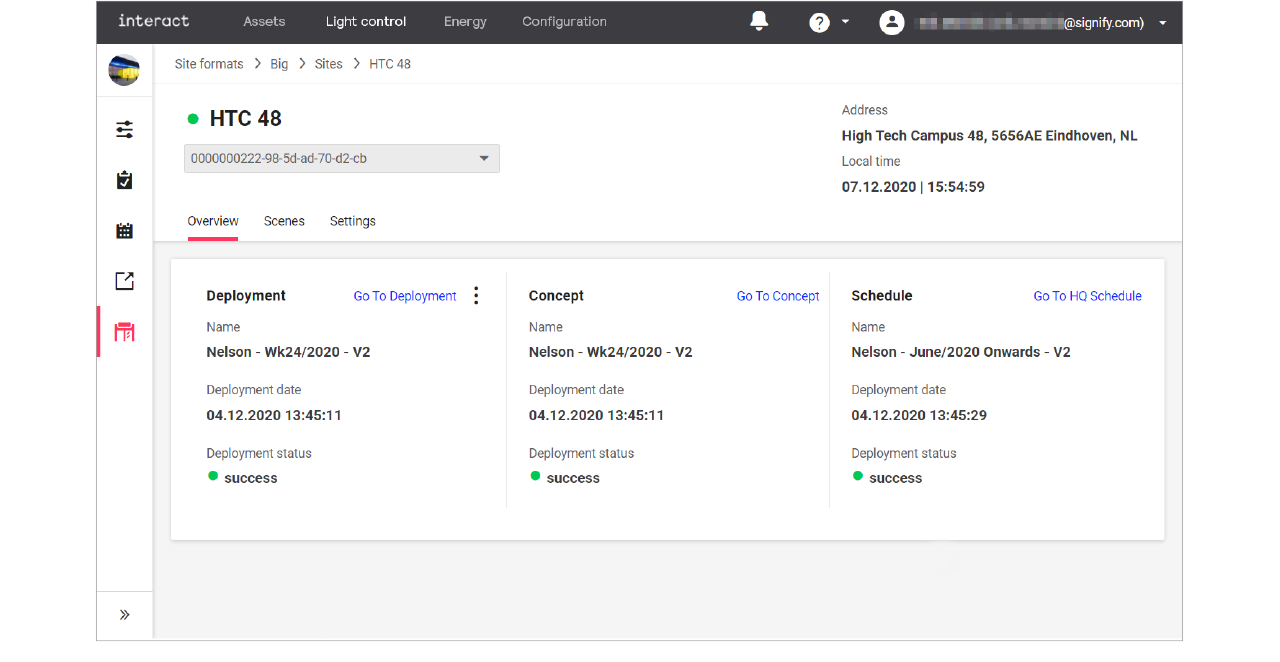
In the Sites view, click Overview.
-
For the chosen site you see an overview of the currently active Deployment, Concept and Schedule.
-
Click:
-
Go To Deployment to see the details of the deployment;
-
Go To Concept to see the details of the concept;
-
Go To HQ Schedule to see the details of the schedule.
-
-
With the mouse, hover over the action menu icon (
 ) in the Deployment section.
-
Click:
-
View logs to open an overview of the logs for the deployment.
-
Redeploy to start the deployment again.
-
Scenes
-
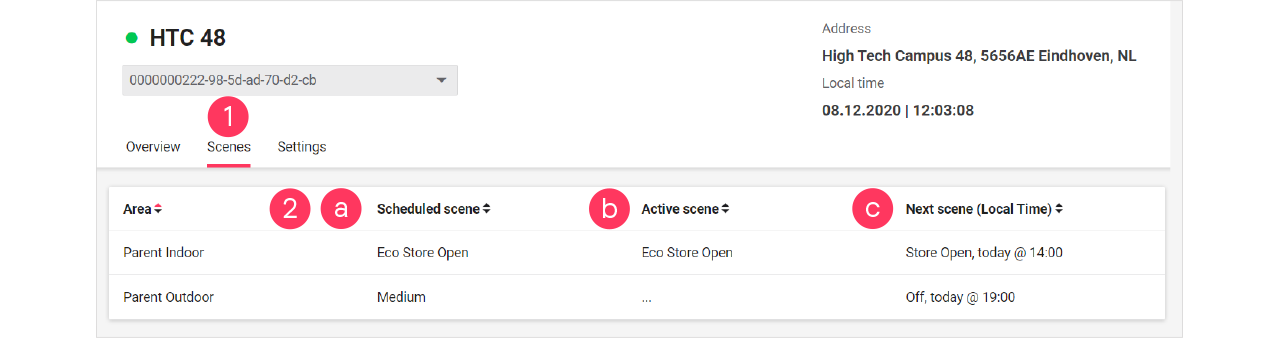
In the Sites view, click Scenes.
-
For the chosen site you see per area an overview of:
-
the currently scheduled scene
-
the active scene (which may be different from the scheduled scene in case of local manual override)
-
the upcoming scene, including the time this scene activates.
-
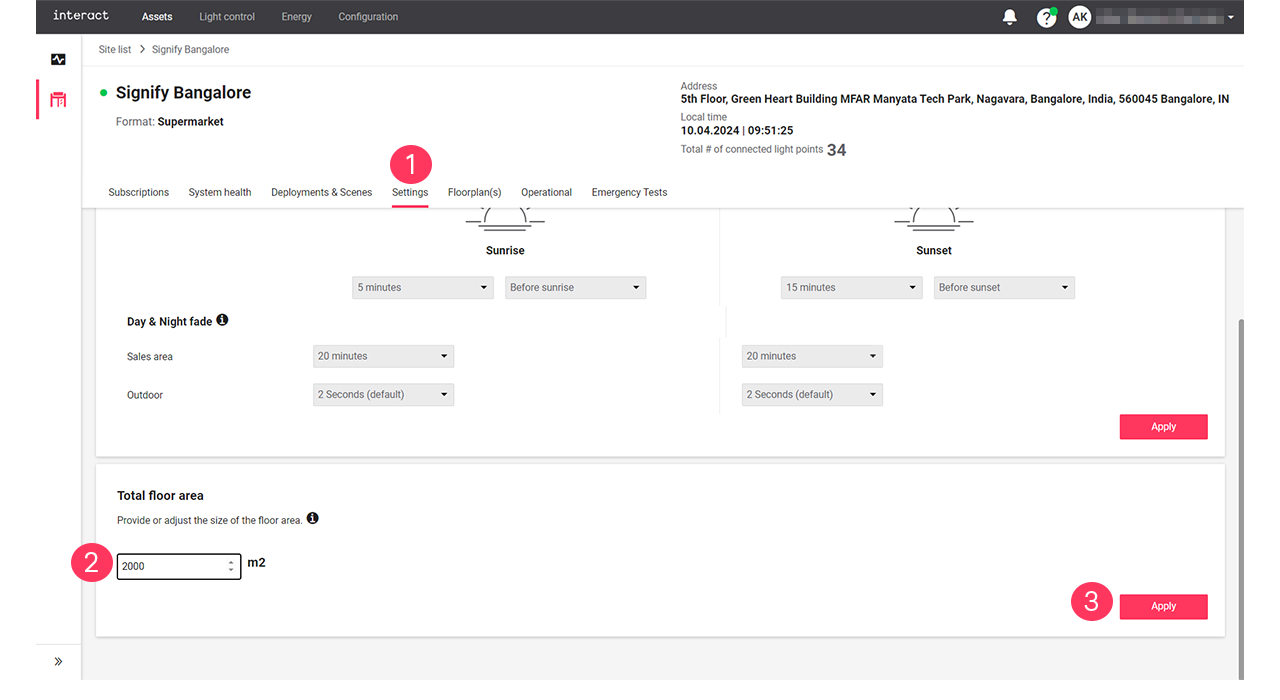
Settings
The Settings section is used to set generic settings that are applicable for the selected site.
Set day and night offset
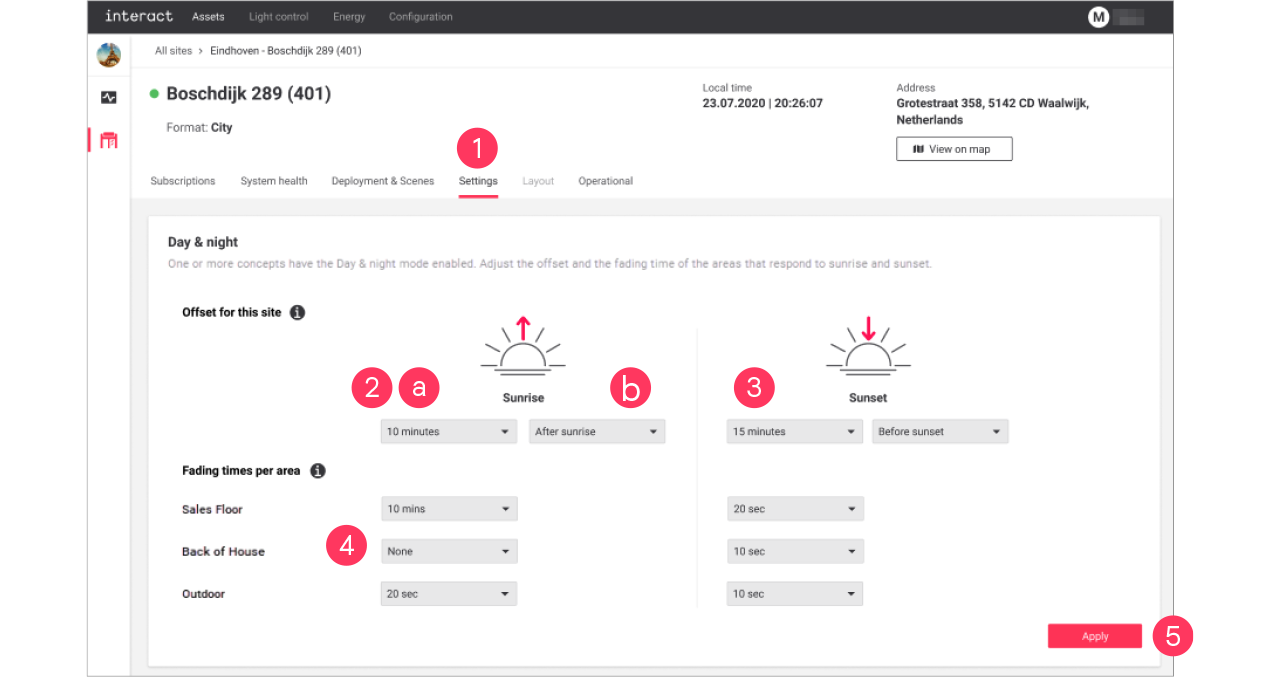
With day and night offset, you can set the moment of the switching action of the lights to before or after sunrise or sunset. When also setting the fading times per area, you define the time it takes for the lights to dim up or down to the set level at sunrise or sunset, taking the offset into account.
-
In the Sites view, click Settings.
-
In the dropdowns for Sunrise:
-
Select the offset time (by default: No offset)
-
Select if the offset should apply Before or After sunrise.
-
-
Repeat both steps for Sunset.
-
Set the Fading times per area that should apply at sunrise or sunset.
-
Click Apply.
Set total floor area
With Total floor area, you can customize the size of the floor area of the selected site. Setting this parameter correctly allows for comparing the energy consumed and saved data per m2 in the energy Site list.
-
In the Sites view, click Settings.
-
Check if the Total floor area value is correct. Enter the correct size of the floor area in m2.
-
Click Apply.