 Concepts
Add and edit concepts
Create new concept
-
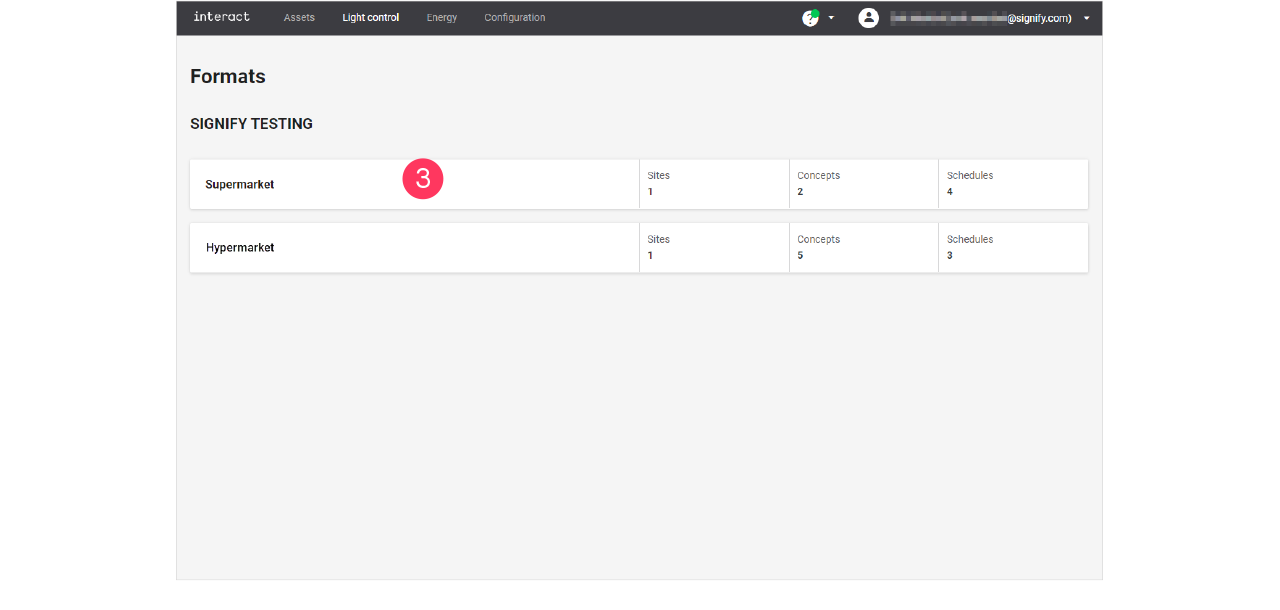
In the menu, click Light control.
-
If applicable, in the dropdown Select a customer, select the customer to show the known formats.
-
Select a format.
-
Click Concepts (
 ).
). -
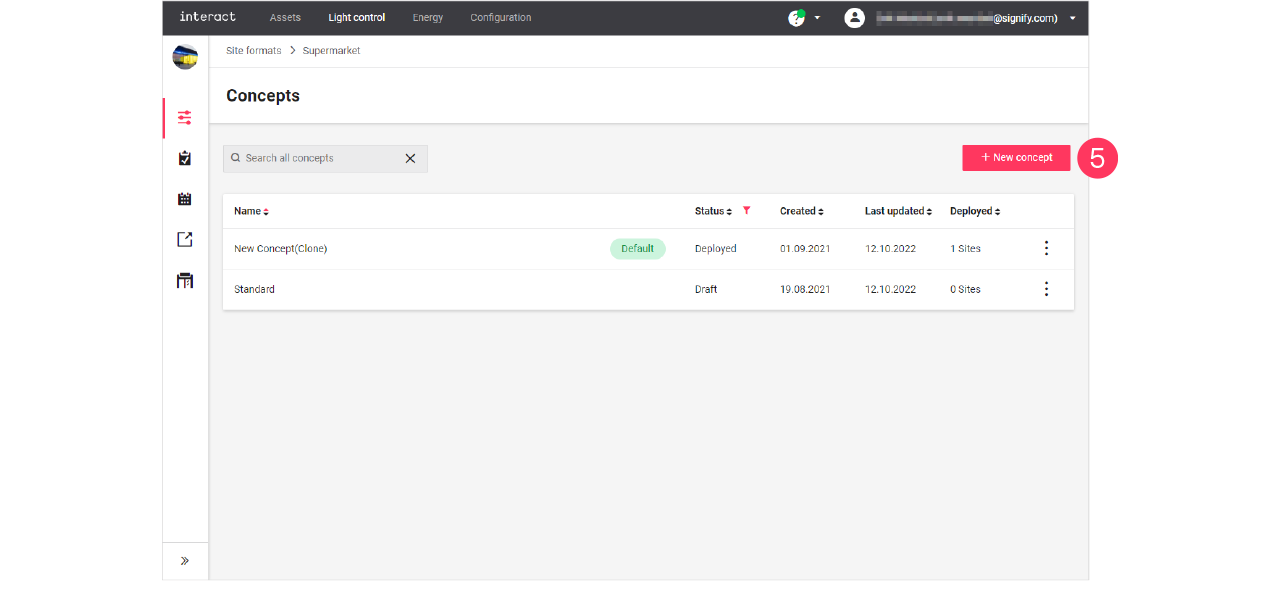
Click + New concept.
-
Enter the Name for the concept.
Click Create. The concept is now available with the status Draft. -
Click the concept and start editing.
Clone existing concept
When you want to reuse an existing concept, for example in case there are only some light levels to change, then you can clone a concept. Cloning is possible for concepts that are in Draft or Deployed status.
-
In the menu, click Light control.
-
If applicable, in the dropdown Select a customer, select the customer to show the known formats.
-
With the mouse, hover over the action menu icon (
 ) of the schedule to edit.
Click Clone.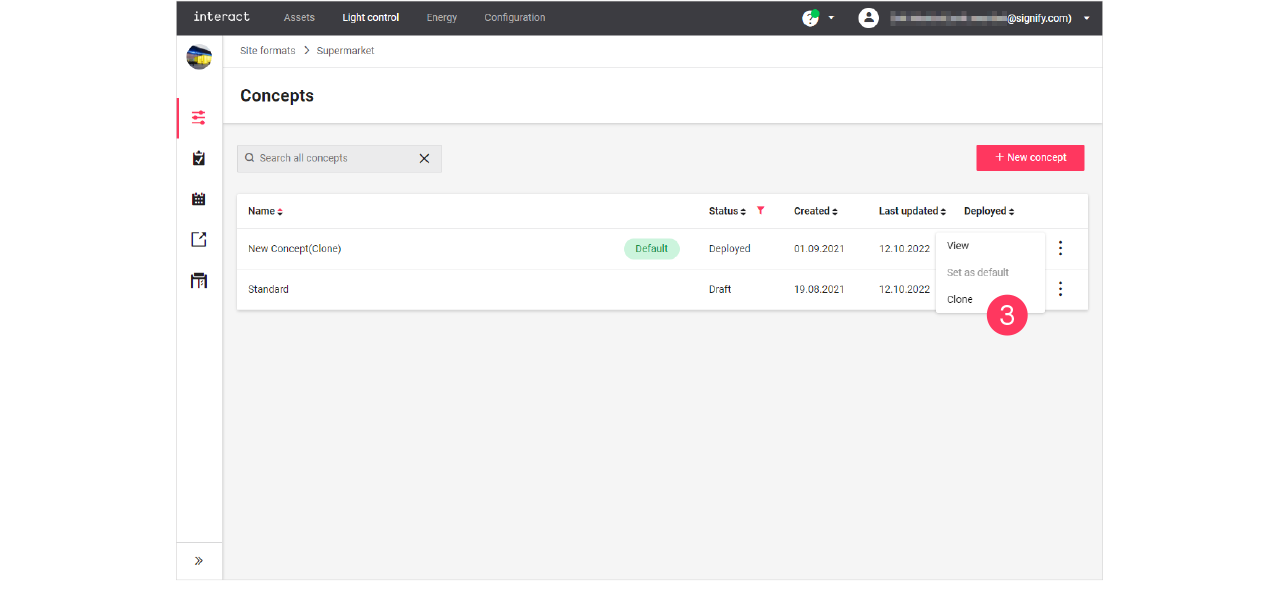
-
Enter the Name for the concept.
Click Create. The concept is now available with the status Draft. -
Click the concept and start editing.
Change light levels
| You can only change the light levels of concepts with the status Draft. |
-
In the menu, click Light control.
-
If applicable, in the dropdown Select a customer, select the customer to show the known formats.
-
Select a format.

-
Click Concepts (
). -
With the mouse, hover over the Action menu icon (
) of the concept to edit. Click Edit.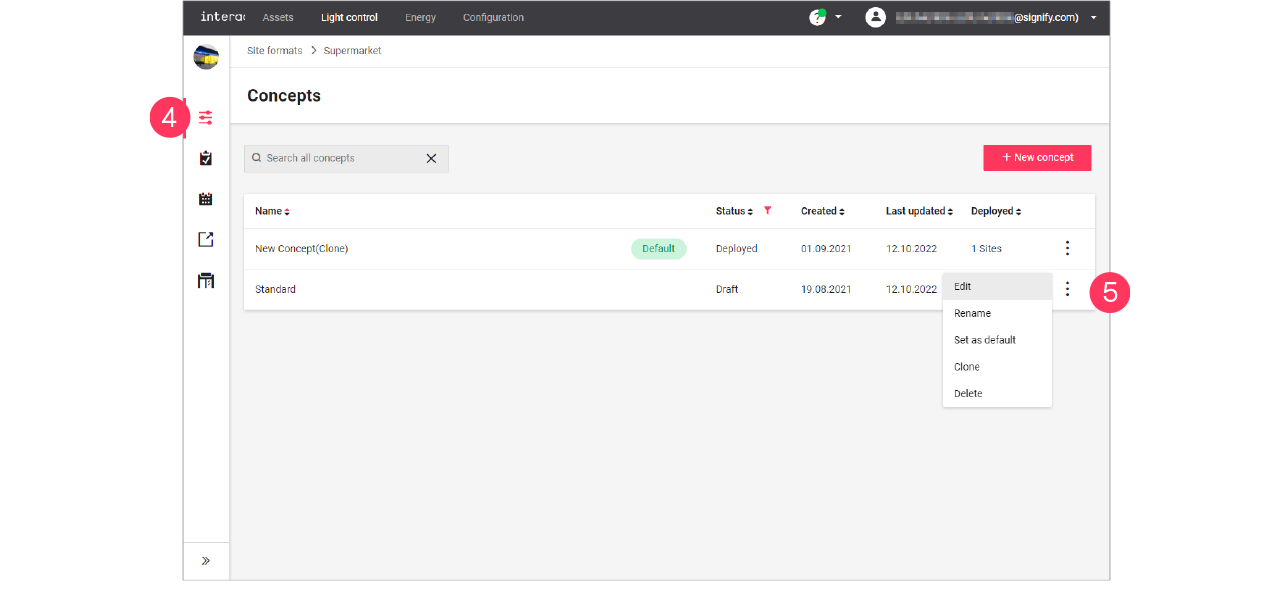
-
Click on the row of an area to start editing;
or: click the name of a scene.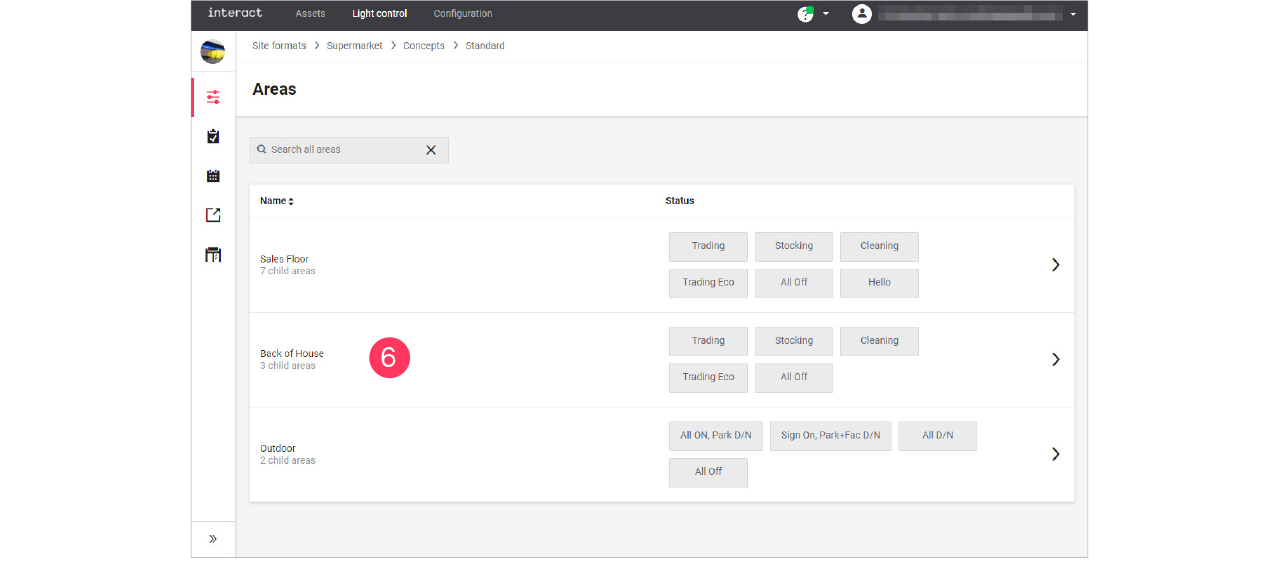
The scene that you edit shows dark. Select another scene to start editing the settings of this scene. -
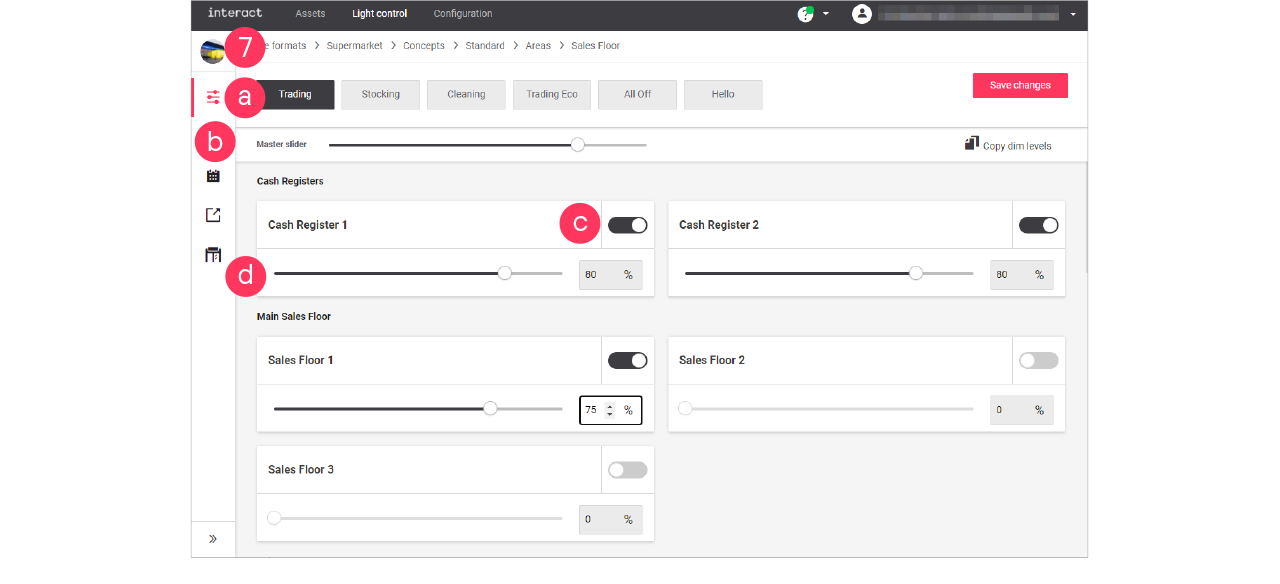
Start editing the light settings for the area:
-
Select a scene to edit its light settings.
-
Use the Master slider to change the relative dim level of all zones that are switched to ON.
-
Switch the zone ON or OFF.
-
Move the dim slider to adjust the light level.
or: Enter the value in the box.
-
-
Click Save changes.
|
Day and night mode
With day and night mode, you can make sure that lights at a site turn on and off according to the schedule, but in relation with sunrise and sunset (astroclock).
After enabling the day and night mode, the logical channel shows two light levels to be set: one for the light levels during daytime, the other for the light levels during the night.
Set day and night mode
When editing the light levels of the area (see section Change light levels):
-
Click the Day/Night toggle button (
 ) to switch on day and night mode for the area.
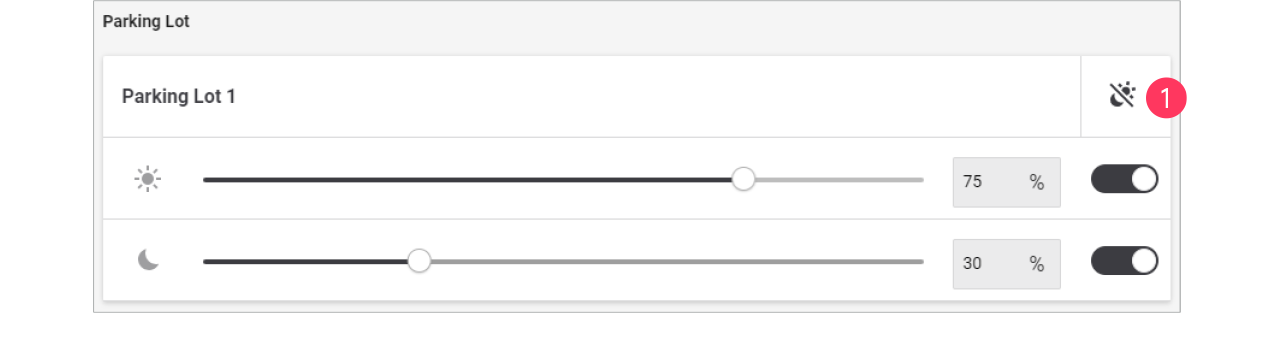
-
Set the light levels to be used during daytime.
-
Set the light levels to be used during the night.
-
Click Save changes.
You can change the offset of the response relative to the sunrise or sunset. See section Settings for more information.
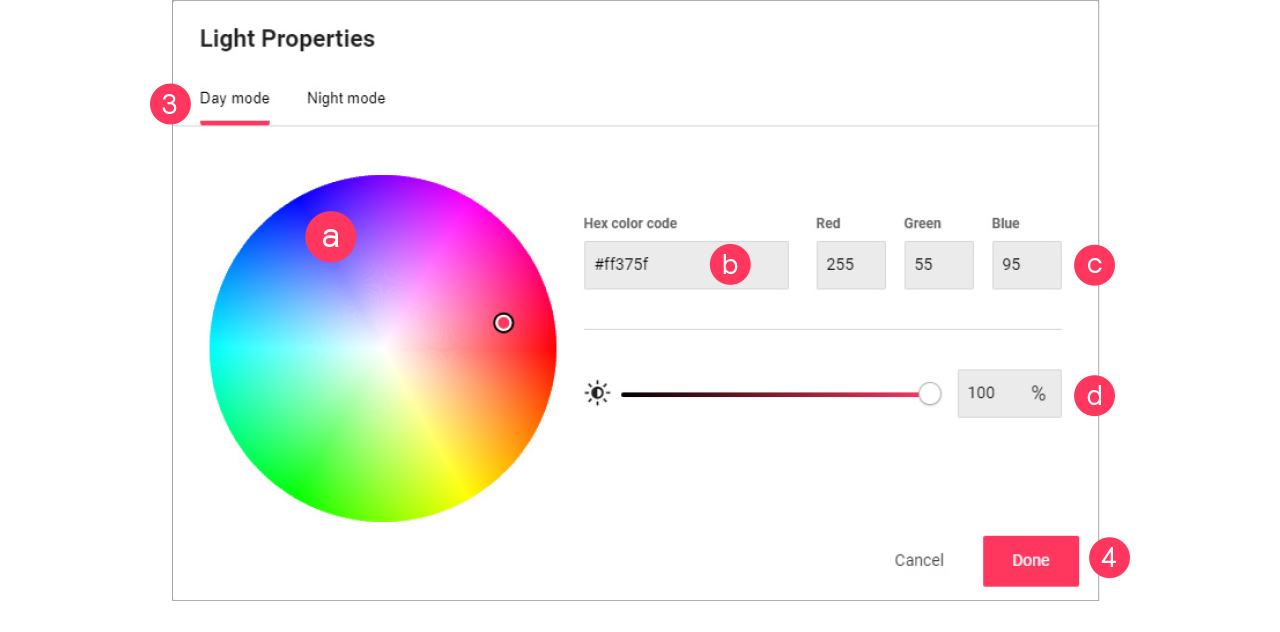
RGB lighting
| With RGB-lighting, you can think of colored accent lighting, or façade lighting. |
When editing the light levels of the area (see section Change light levels):
-
Set the light level of the area.
-
Click the Color picker button (
 ).
).
-
Set the Light properties:
-
Color by selecting it in the color wheel
-
Color by Hex code
-
Color by RGB
-
Light level
-
-
Click Done.