Zones and Channels
Add, edit and reorder control zones
| Keep in mind that adding or editing control zones impacts all sites that use the selected format. Therefore, this should be done with caution. |
| Control zones are also called child or nested areas. |
Child areas, or control zones, are smaller groups of lights that can have their own setting in the area.
Add child area
-
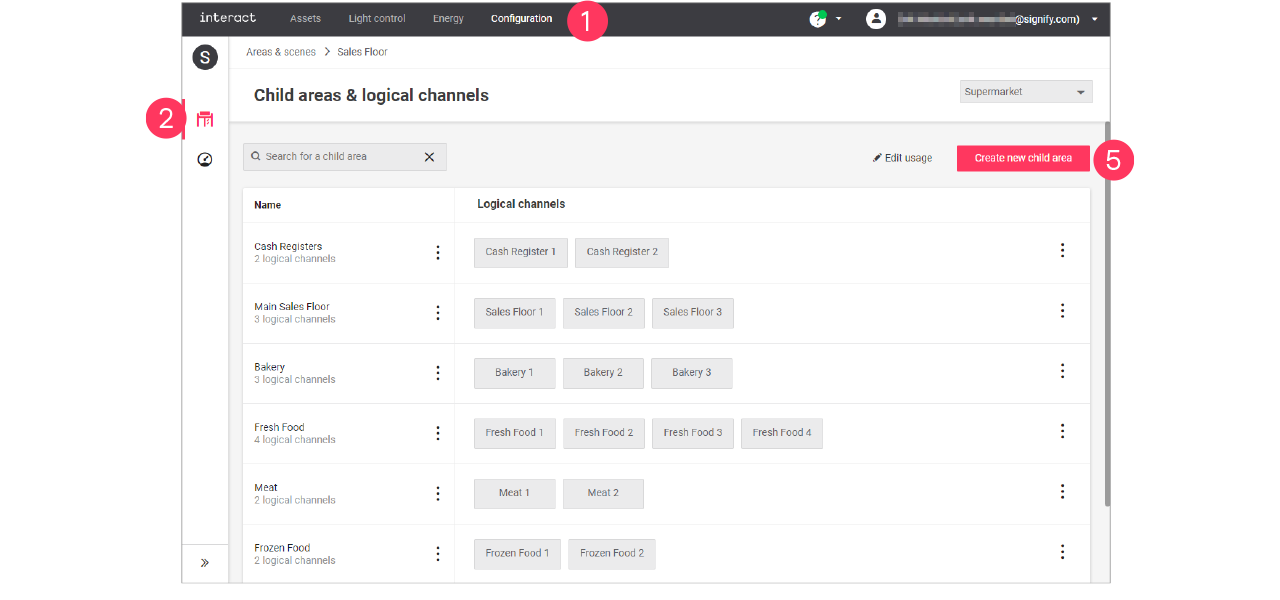
In the menu, click Configuration.
-
Select Areas & scenes (
 ).
). -
Optionally, select the Format.
-
Click an Area to show the list of child areas.
-
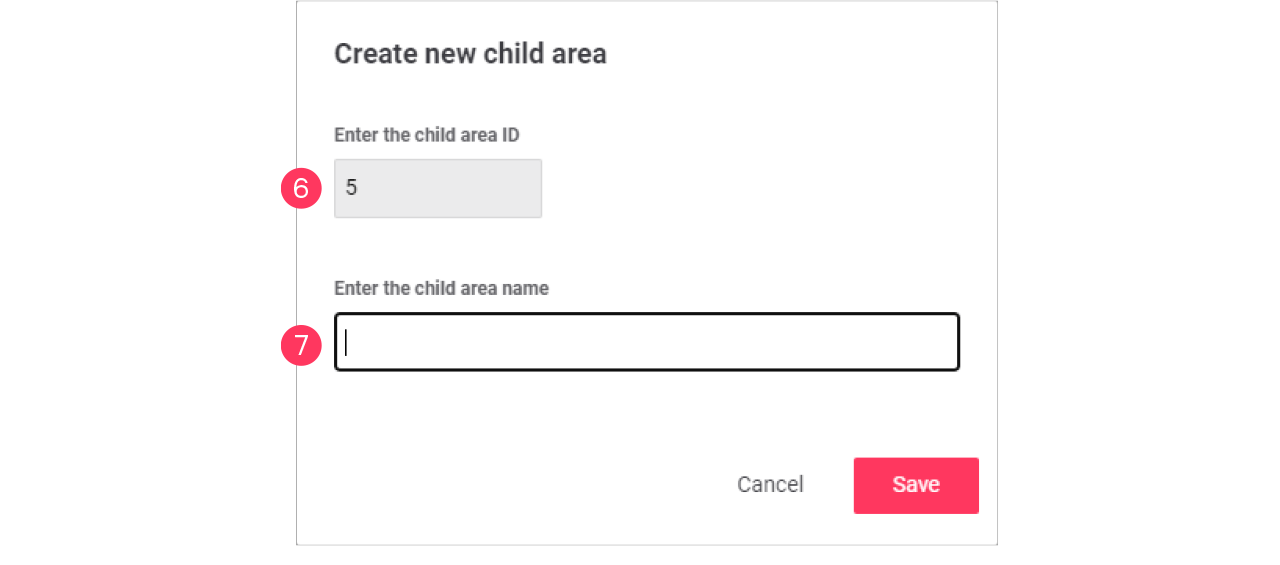
Click Create new child area.
-
Enter the ID number for the child area.
-
Enter the Name of the child area.
Click Save.
Edit child area
-
With the mouse, hover over the Action menu icon (
 ) of the child area to edit.
Click Edit child area.
-
In the Edit child area menu, change the required settings (ID, Name).
Click Save.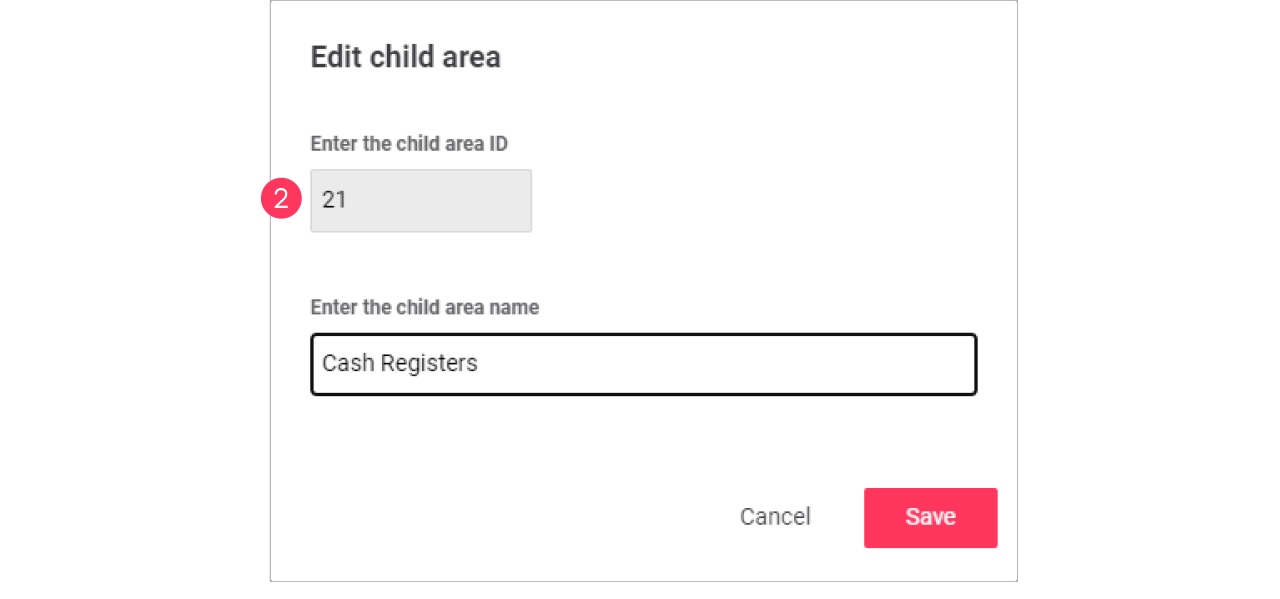
Edit usage of a child area
-
With the mouse, hover over the Action menu icon (
) of the child area to edit.
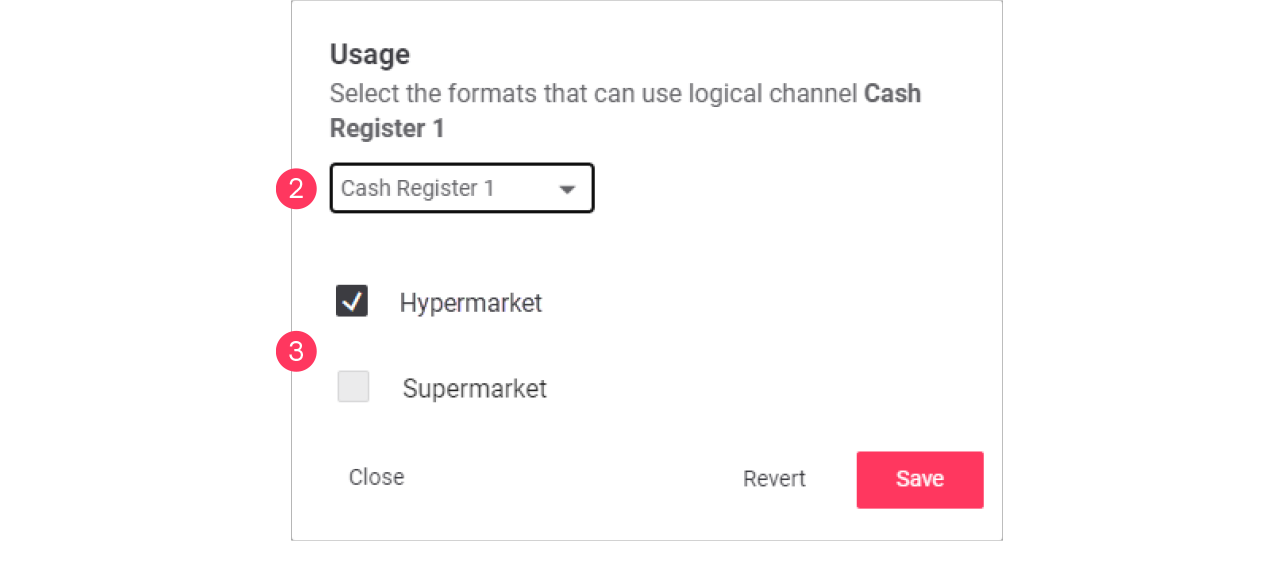
Click Usage to change which format can use the child area.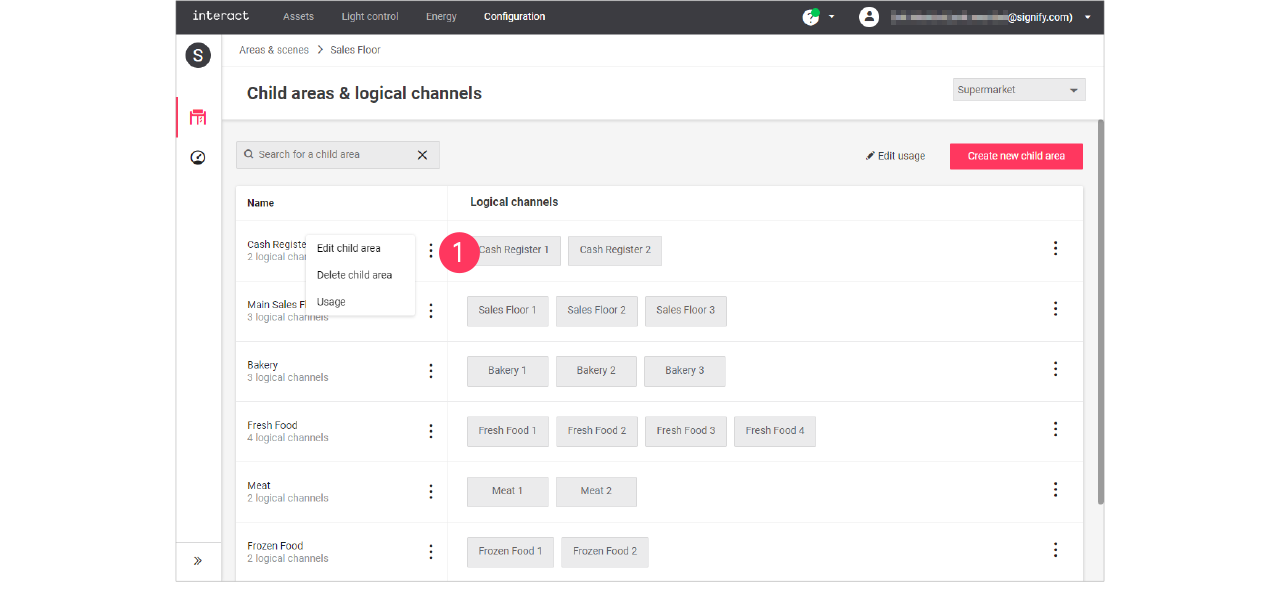
-
In the Usage menu, select the formats that can include the selected child area.
Click Save.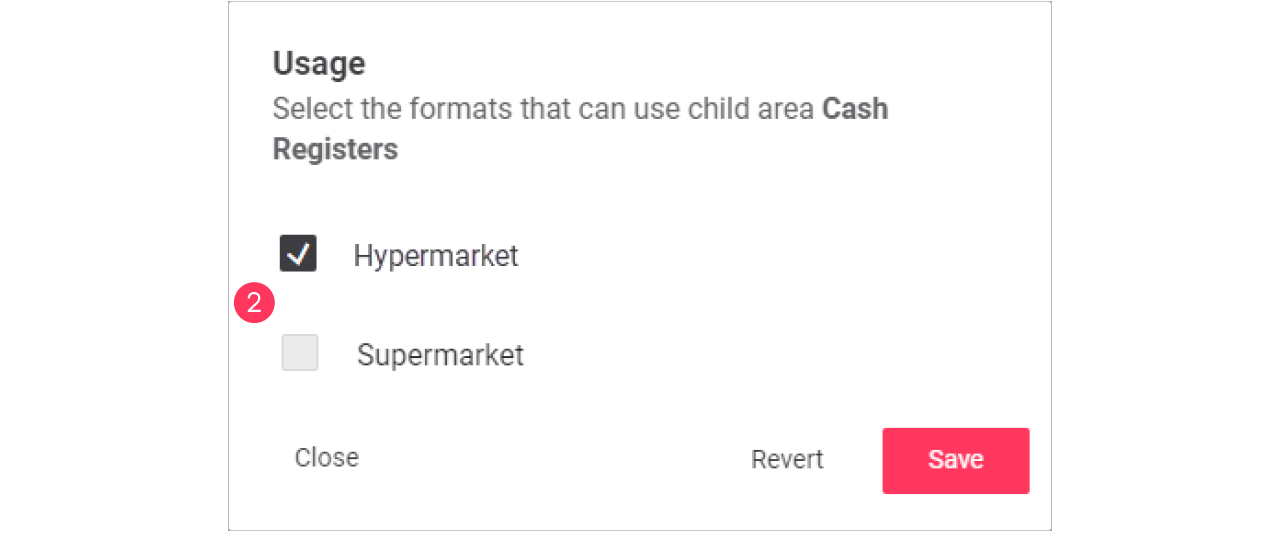
Advanced usage editing
The differences between the formats has also an effect on the scenes that can be used. The average size of a format plays a role in the number of scenes used per area, but also a more luxurious feel for one format would require more scenes. Usage editing gives you the possibility to enable or disable the usage of scenes for a specific format.
-
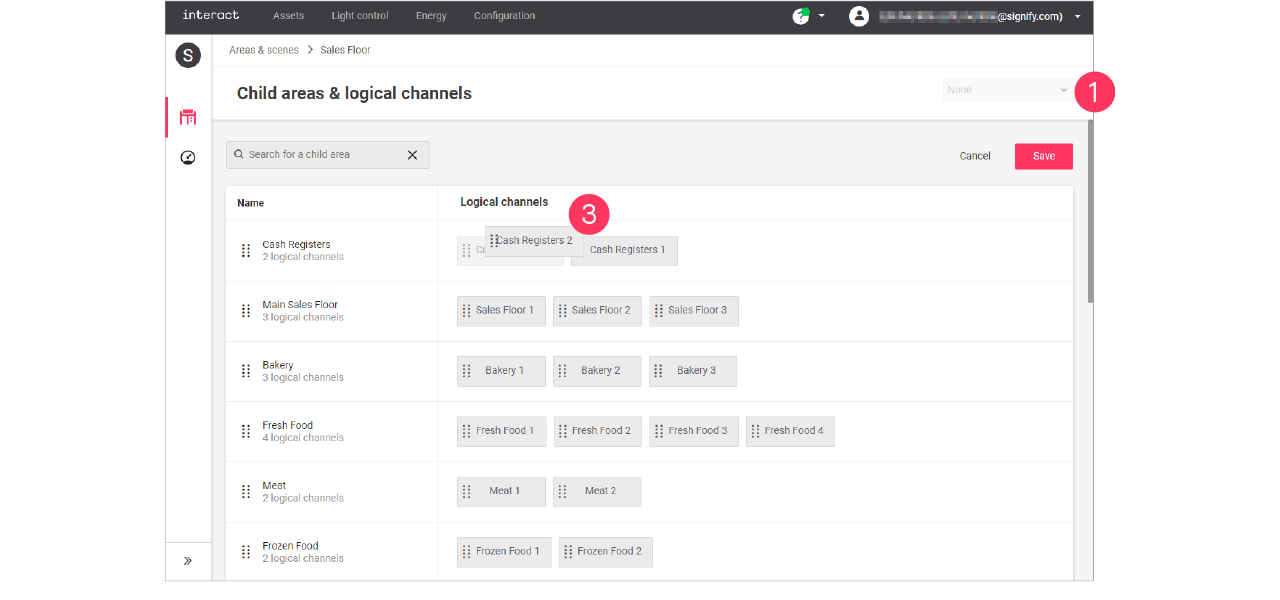
Start with selecting the Format.
-
Click (
 ) Edit usage.
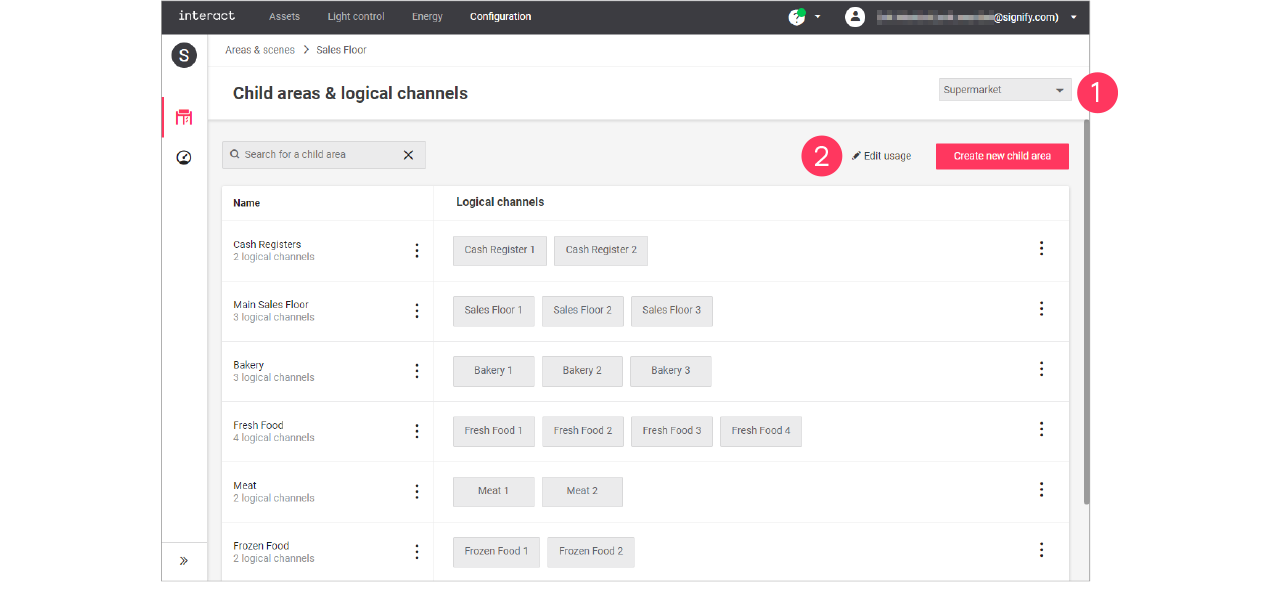
-
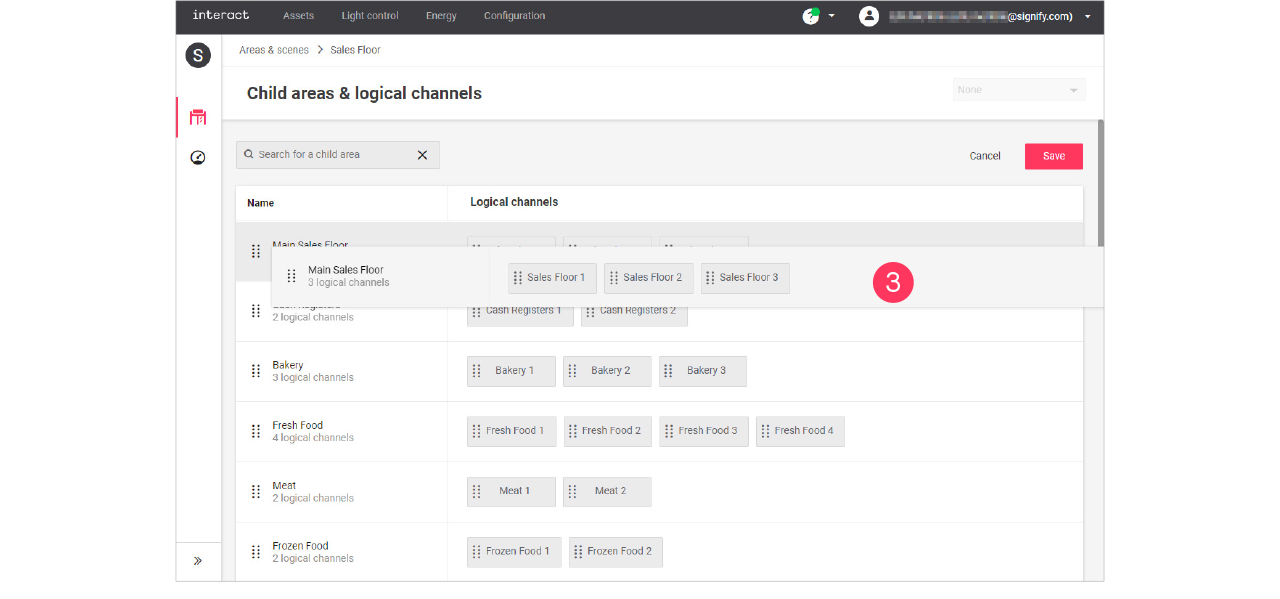
Clear the checkmark next to the Name of the child area to change its usage in the format.
-
Click the names of the Logical channels to change its usage in the format.
Click Save.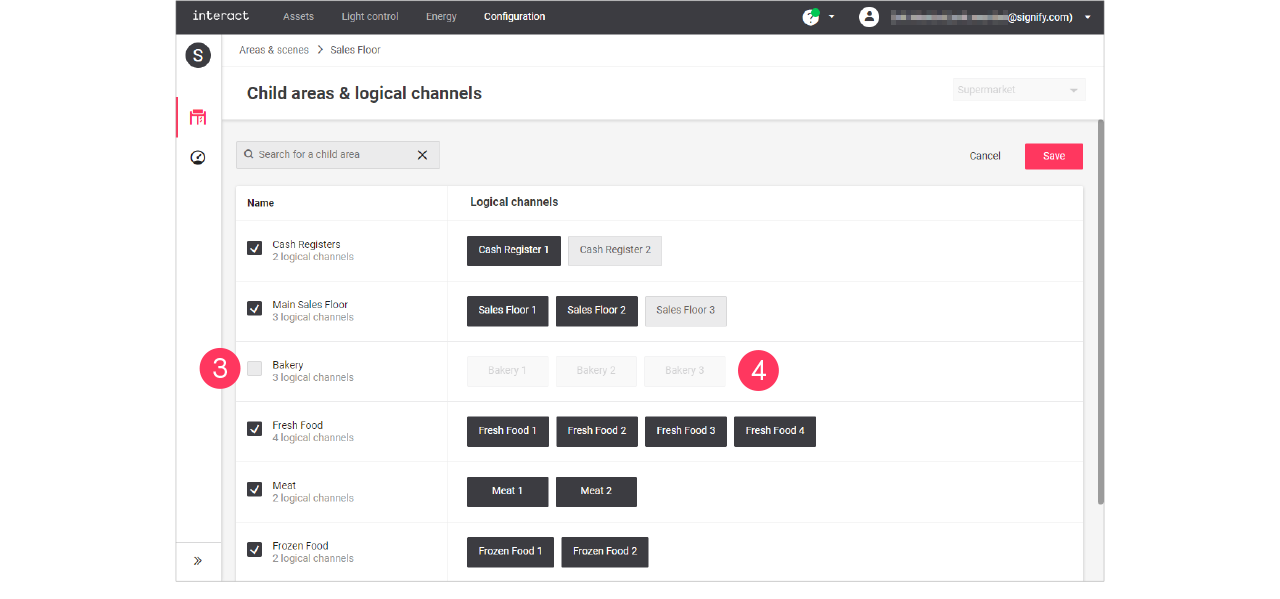
Child areas and/or Logical channels that are greyed out are excluded for usage in the selected format.
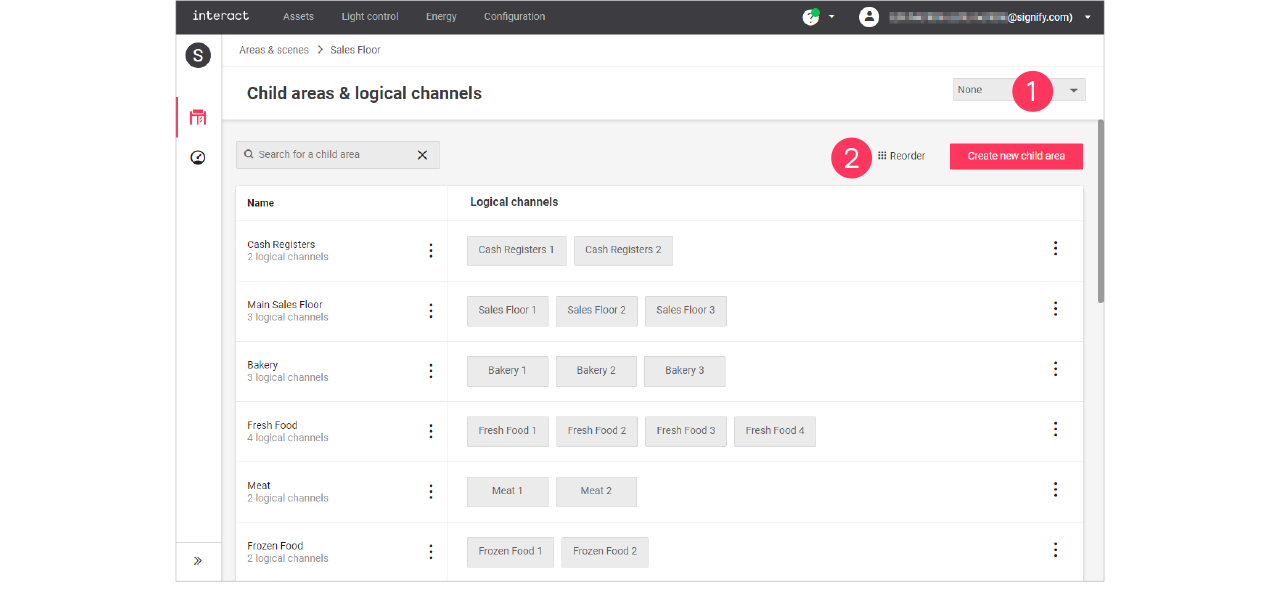
Add, edit and reorder logical channels
| Keep in mind that adding or editing logical channels impacts all sites that use the selected format. Therefore, this should be done with caution. |
Add logical channel
-
In the menu, click Configuration.
-
Select Areas & scenes (
). -
Optionally, select the Format.
-
Click an Area to show the list of child areas.
-
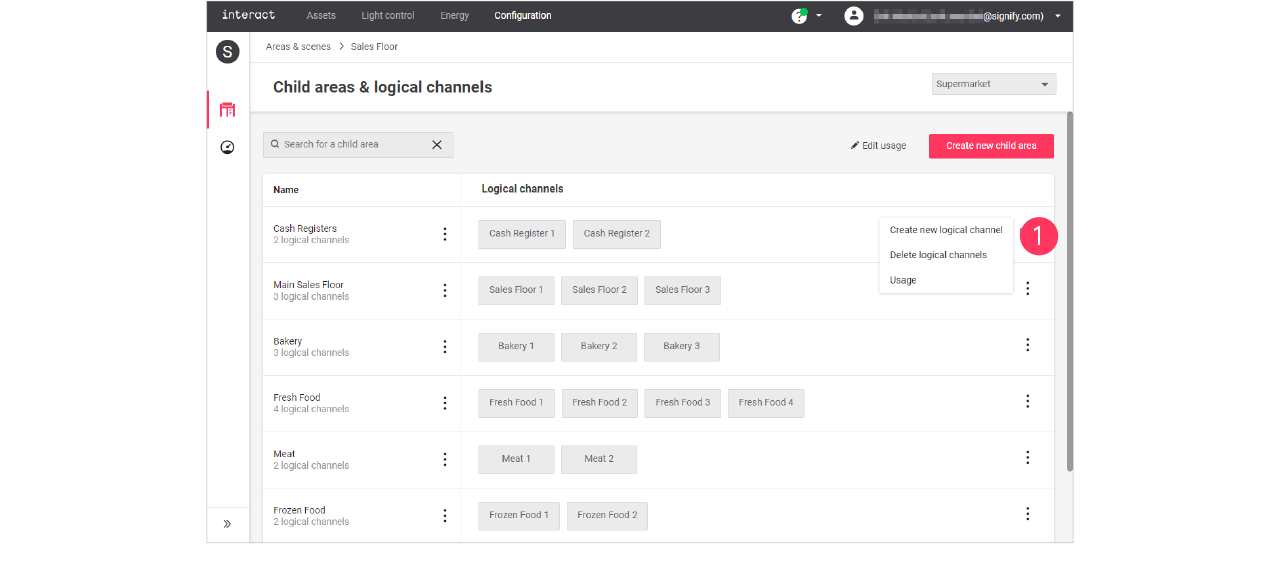
With the mouse, in the Logical channels column next to the child area to add the channel to, hover over the Action menu icon (
).
Click Create new logical channel.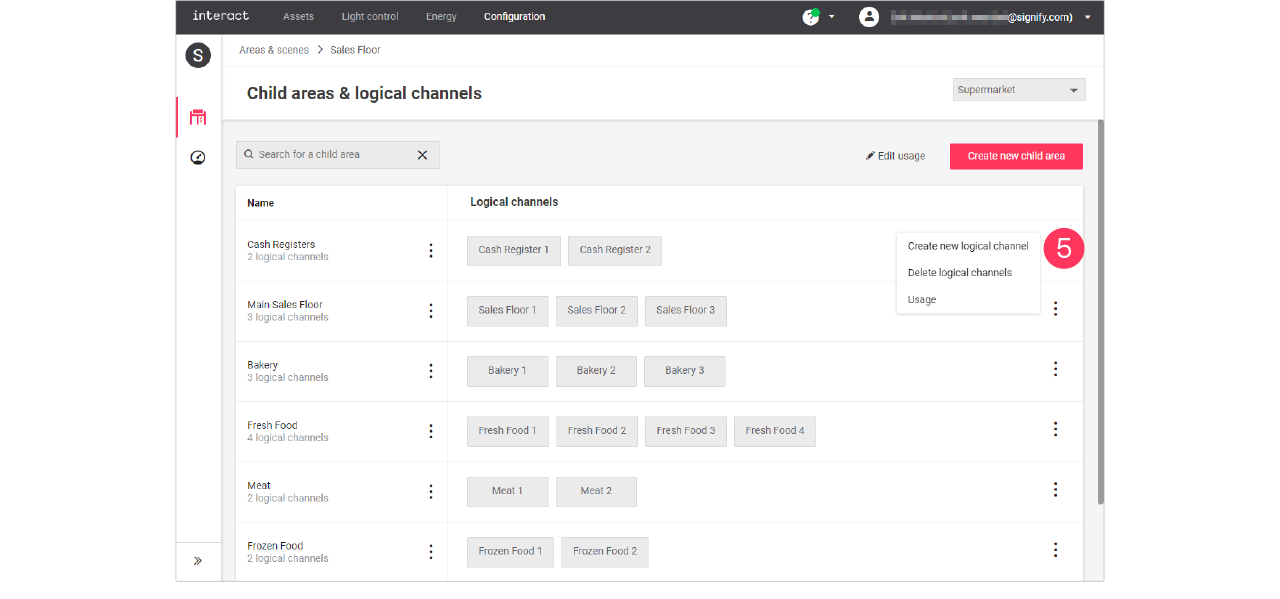
-
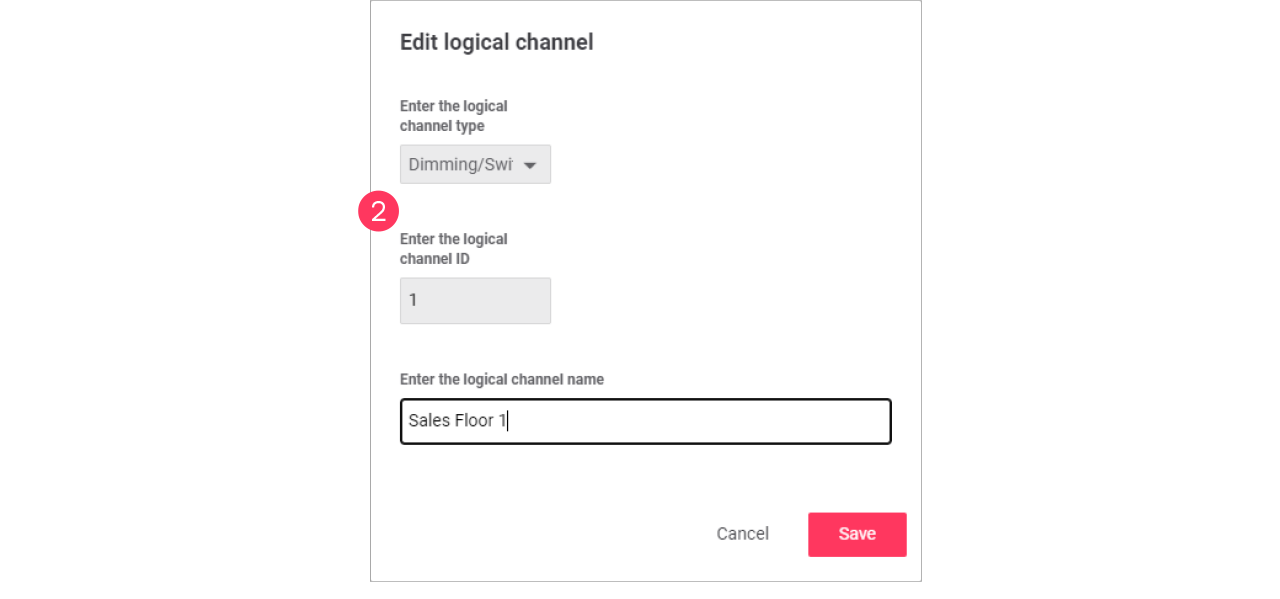
Use the dropdown to select the type of logical channel, set by default to Dimming/Switching.
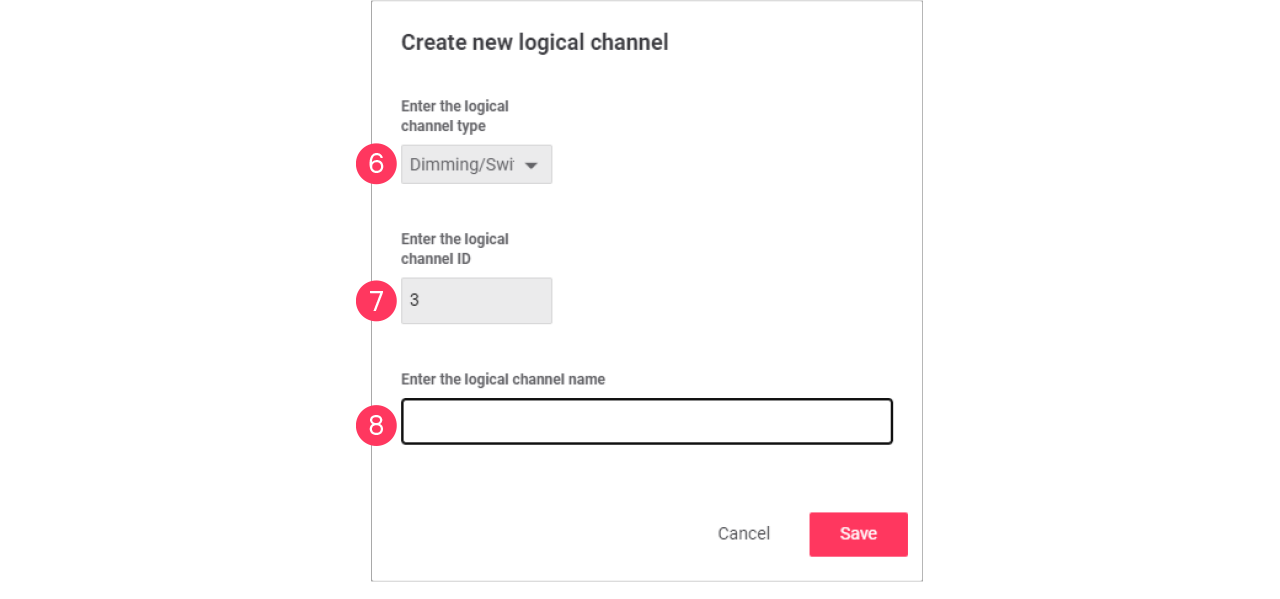
-
Enter the ID number for the channel.
-
Enter the Name of the child area.
Click Save.
| Select the type RGB when the use of the channel is intended for, for example, colored accent lighting. |
Edit a logical channel
-
With the mouse, in the Logical channels column, click the Channel to edit.
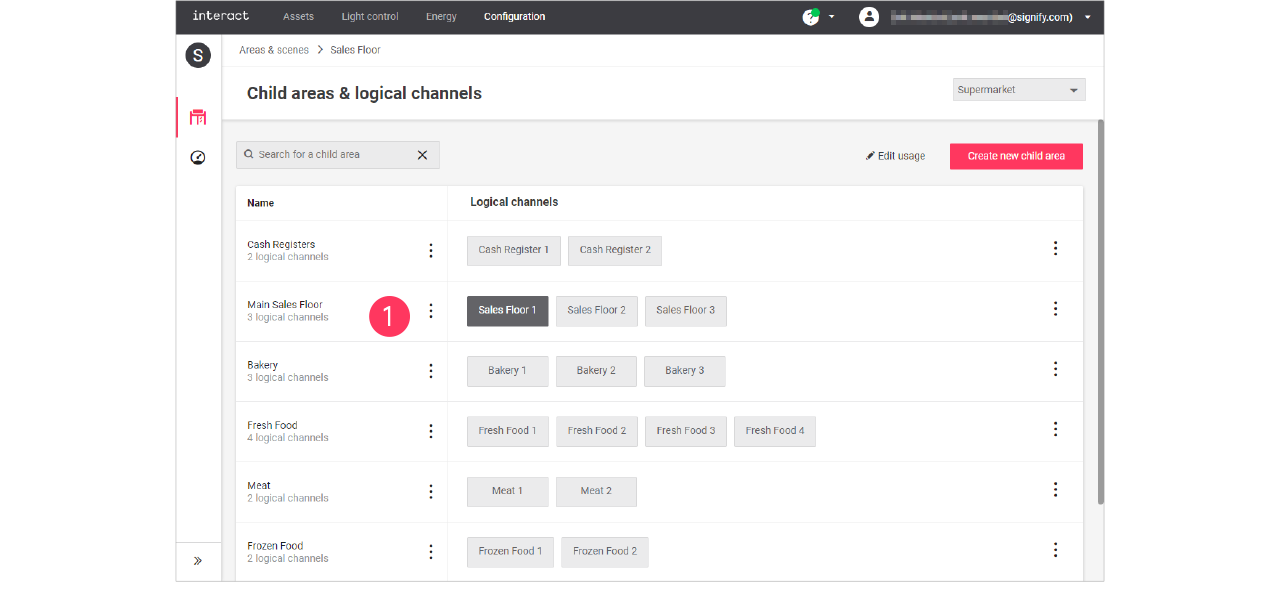
-
In the Edit logical channel menu, change the required settings (type, ID, Name).
Click Save.