Areas and Scenes
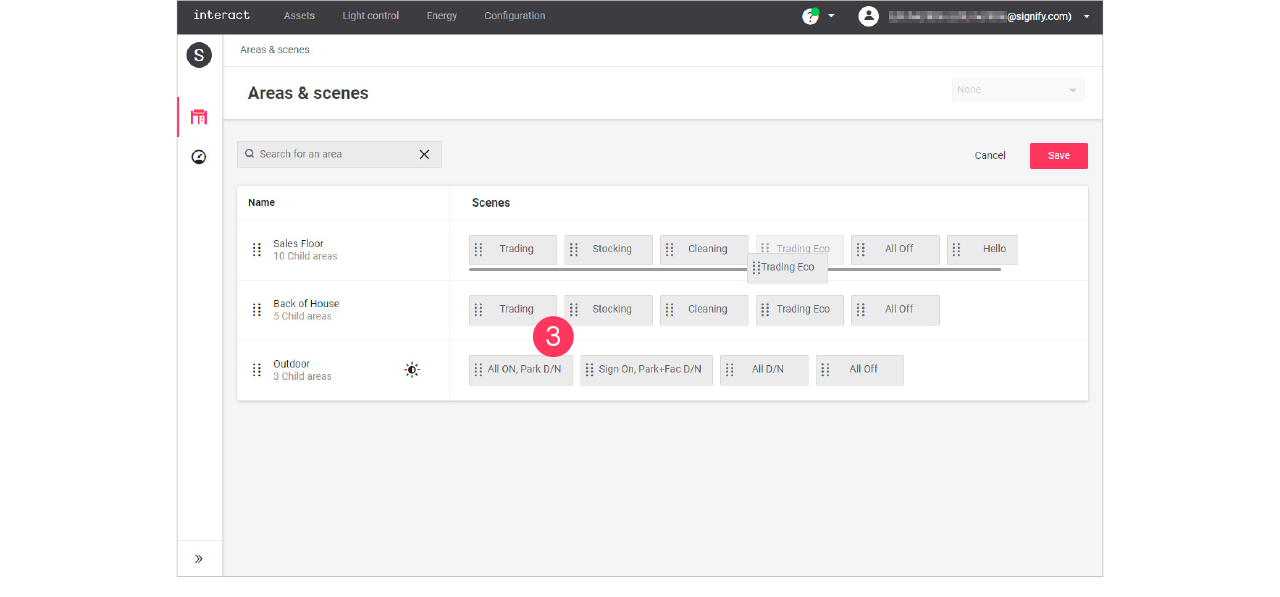
Add, edit and reorder areas
| Keep in mind that adding or editing areas impacts all sites that use the selected format. Therefore, this should be done with caution. |
Add area
-
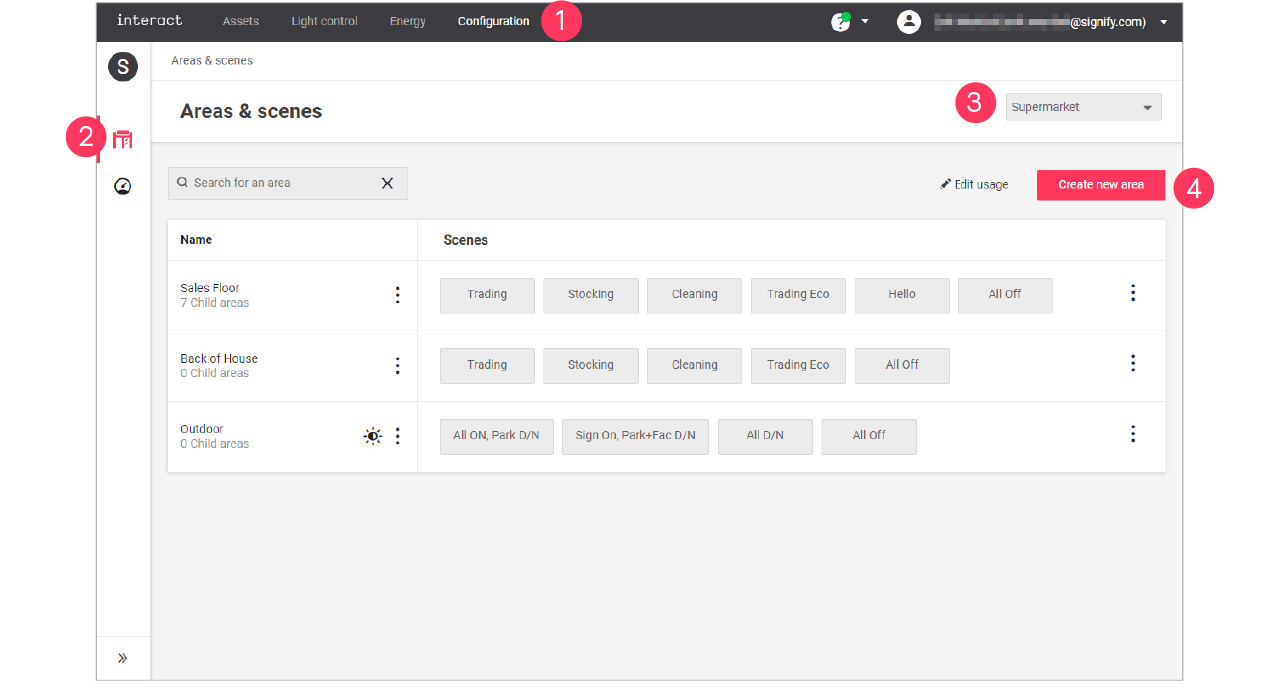
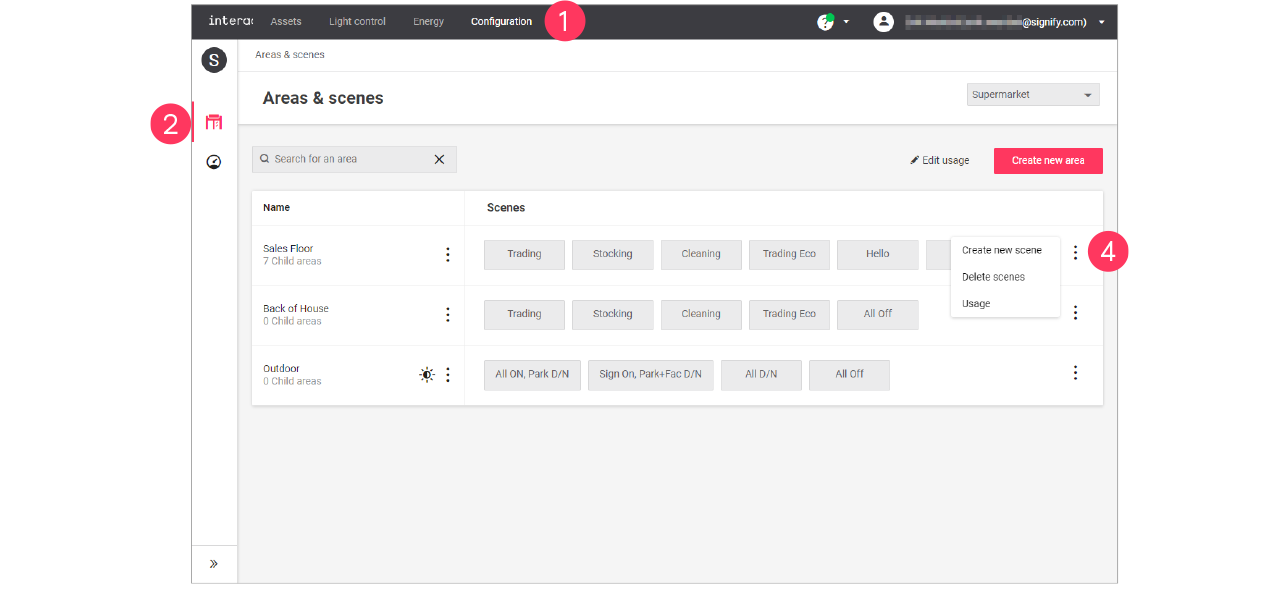
In the menu, click Configuration.
-
Select Areas & scenes (
 ).
). -
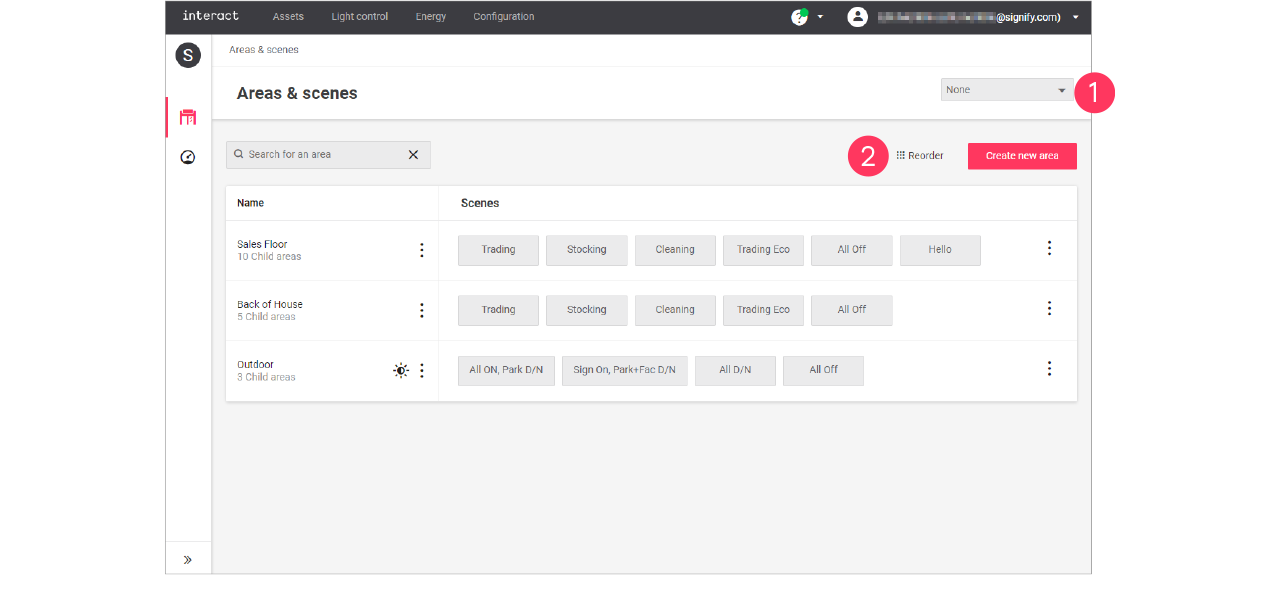
Optionally, select the Format.
-
Click Create new area.
-
Enter the ID number for the area.
Area IDs are part of the intake document and correspond with area usage for all sites. It’s important to use IDs consistent on newly created areas and not reusing them. 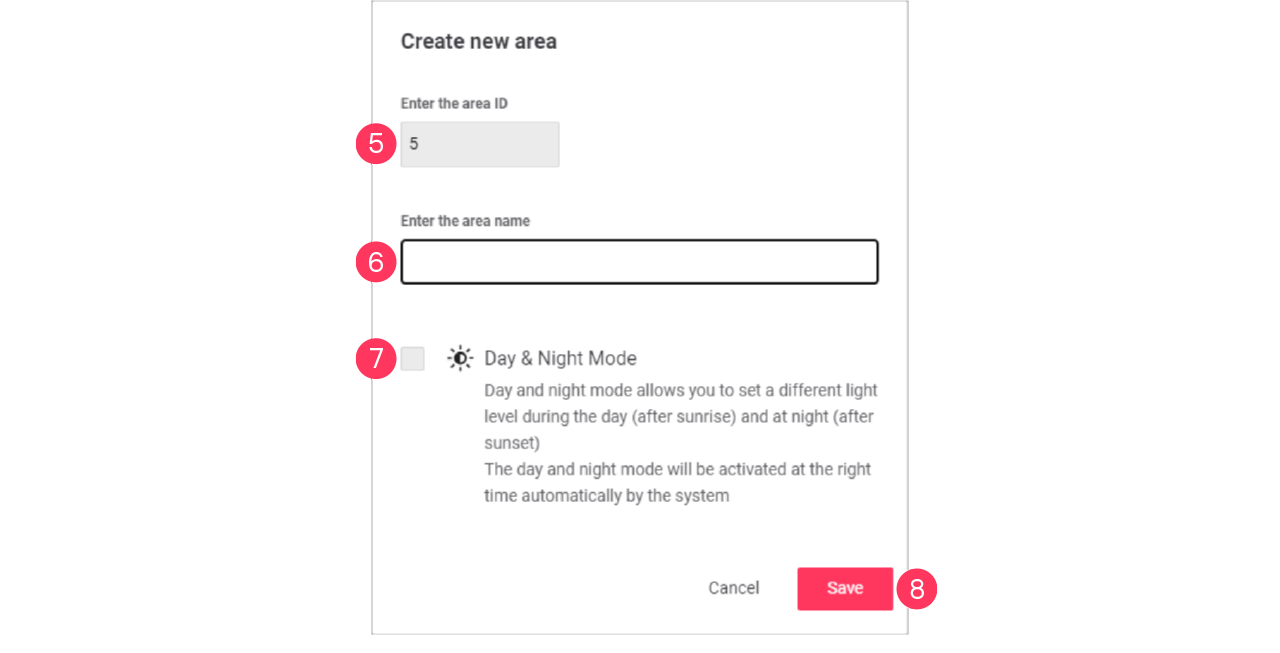
-
Enter the Name of the area.
-
Optionally, select the checkbox
 Day & Night Mode to enable this option.
 -
Click Save.
|
Edit area
-
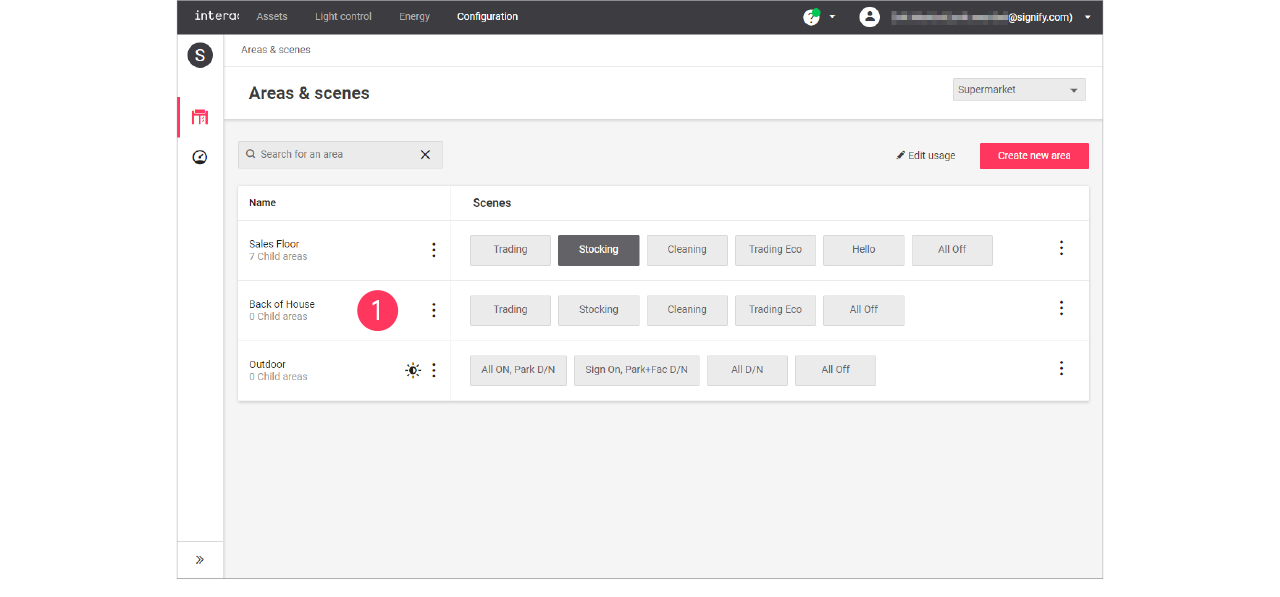
With the mouse, hover over the Action menu icon (
 ) of the area to edit.
Click Edit area.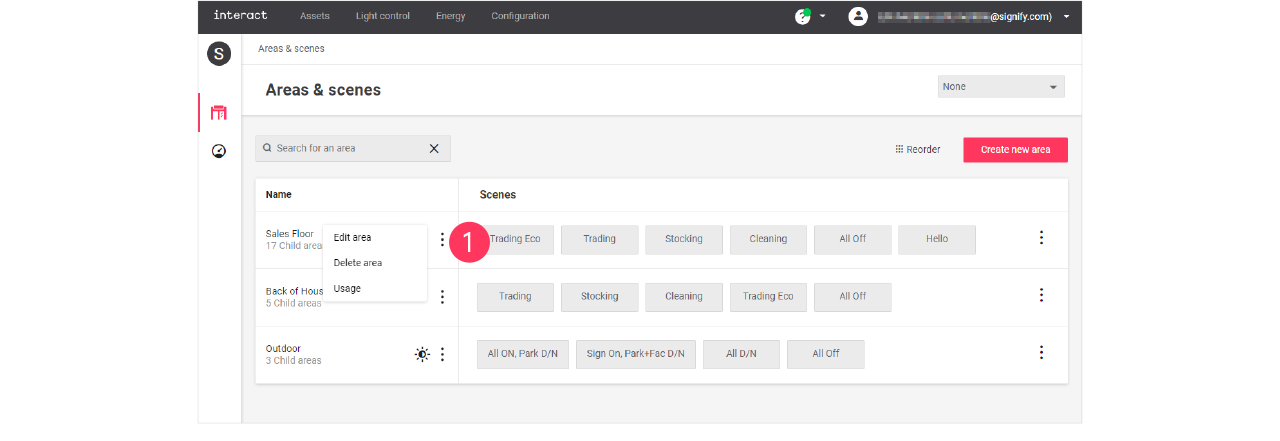
-
In the Edit area menu, change the required settings (ID, Name, Day & Night Mode).
Click Save.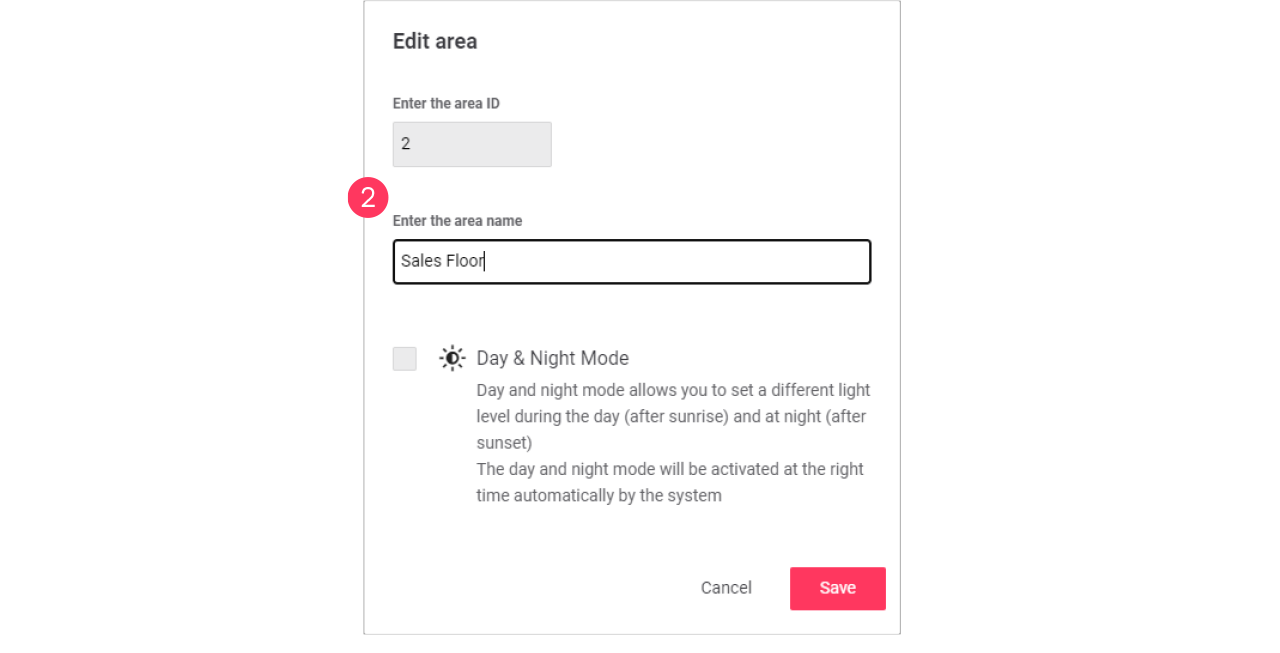
-
Enabling the day and night mode activates automatic switching of the area by the system based on sunrise and sunset.
-
Areas with the day and night mode enabled can be identified by the
icon. -
See section Day and night mode for more information.
-
Edit usage of an area
-
With the mouse, hover over the Action menu icon (
) of the area to edit.
Click Usage to change which format can use the area.
-
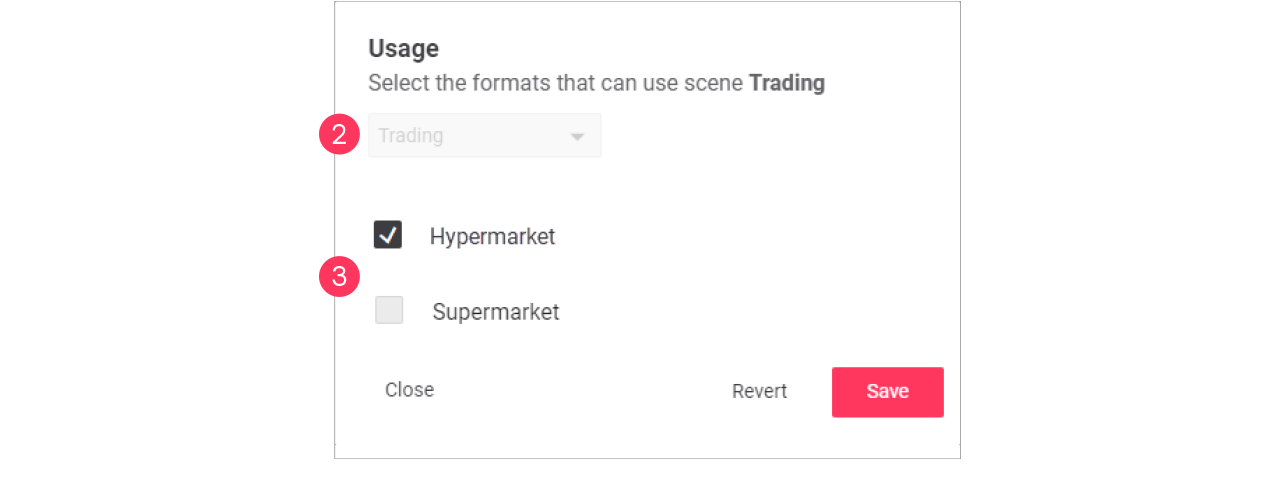
In the Usage menu, select the formats that can include the selected area.
Click Save.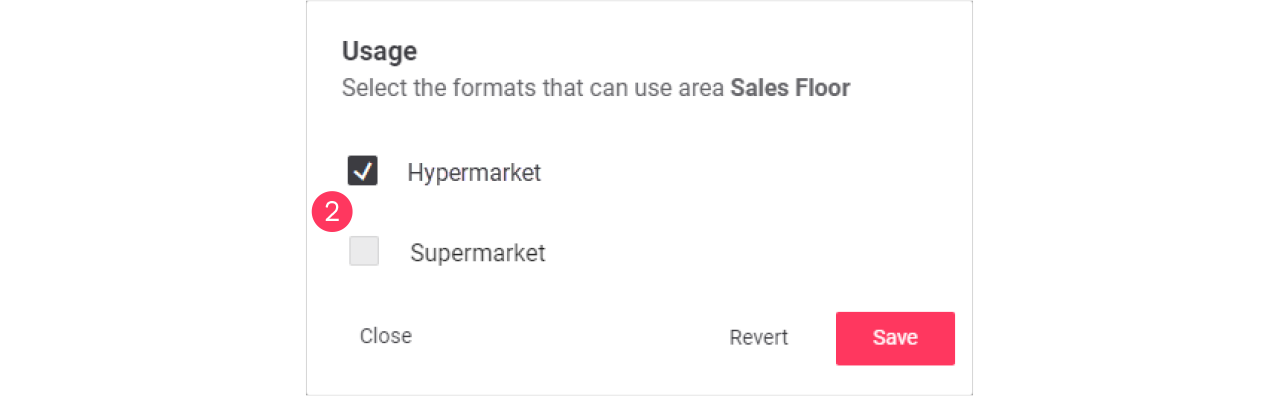
Advanced usage editing
Most brands operate multiple formats, that have their commonalities and differences. Usage editing gives you the possibility to enable or disable the usage of areas for a specific format.
-
Start with selecting the Format.
-
Click (
 ) Edit usage.
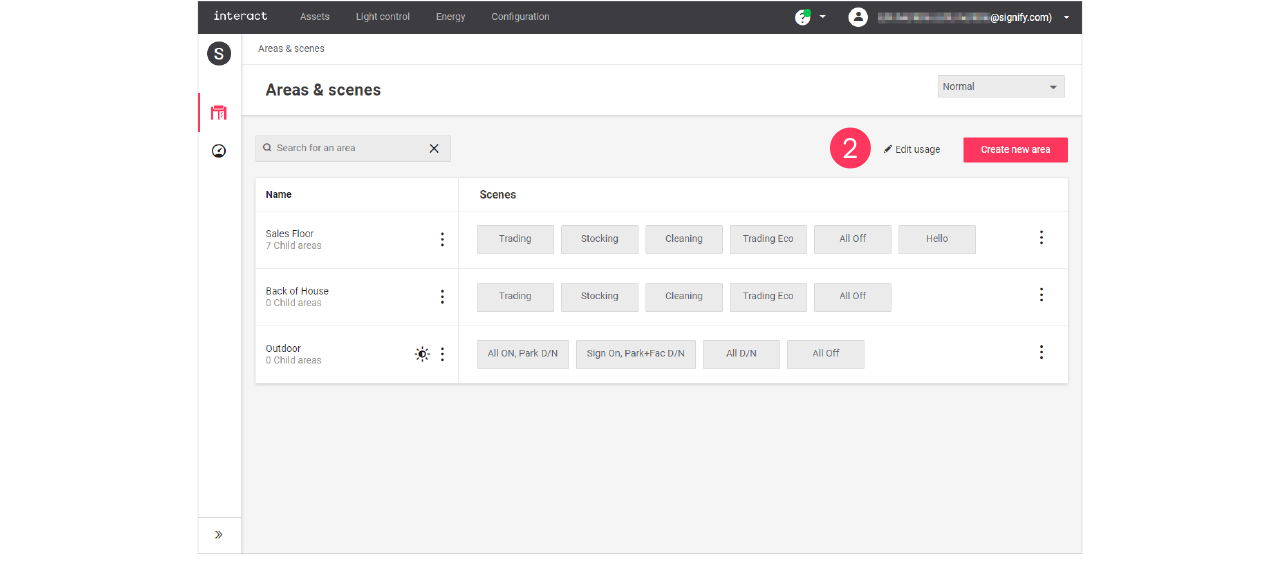
-
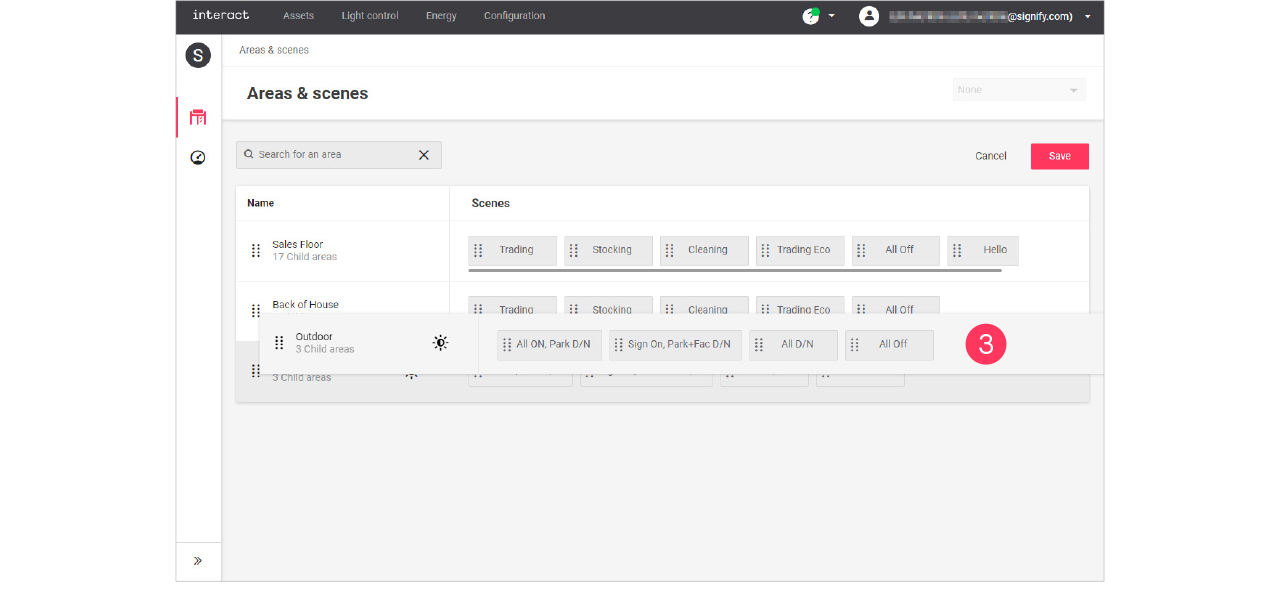
Clear the checkmark next to the Name of the area to change its usage in the format.
-
Click the names of the Scenes to change usage of the area in the format.
Click Save.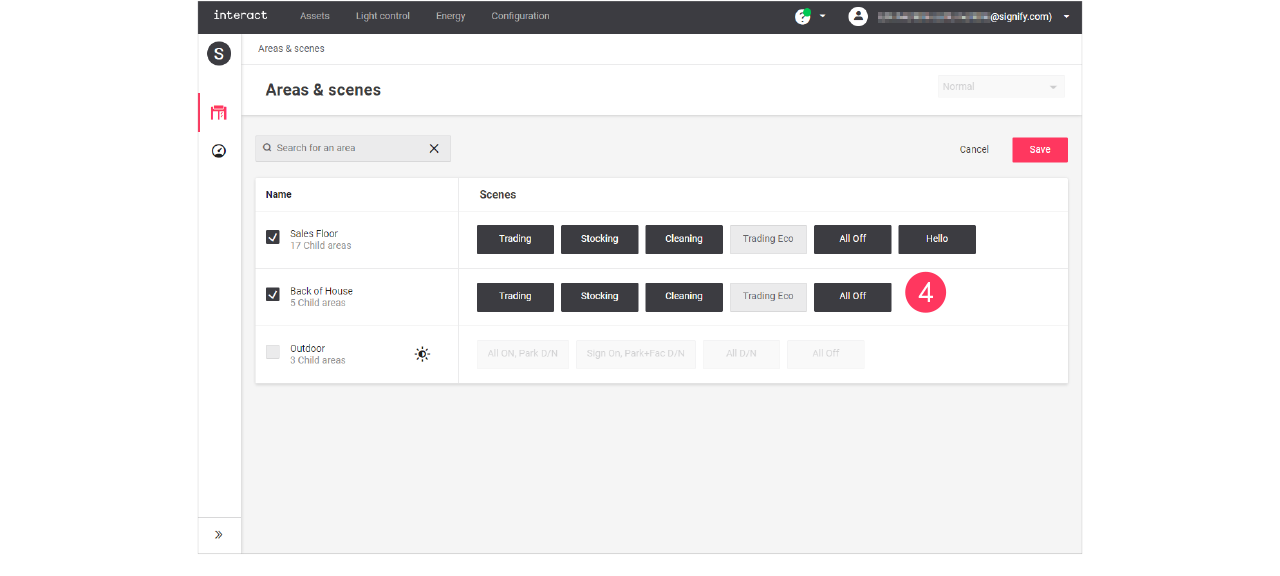
Areas and/or scenes that are greyed out are excluded for usage in the selected format.

Add, edit and reorder scenes
Add scene
-
In the menu, click Configuration.
-
Select Areas & scenes (
).
-
Optionally, select the Format.
-
With the mouse, in the Scenes column next to the area to add the scene to, hover over the Action menu icon (
).
Click Create new scene. -
Enter the ID number for the scene.
The ID numbers follow a sequential order. -
Enter the Name of the scene.

Click Save.
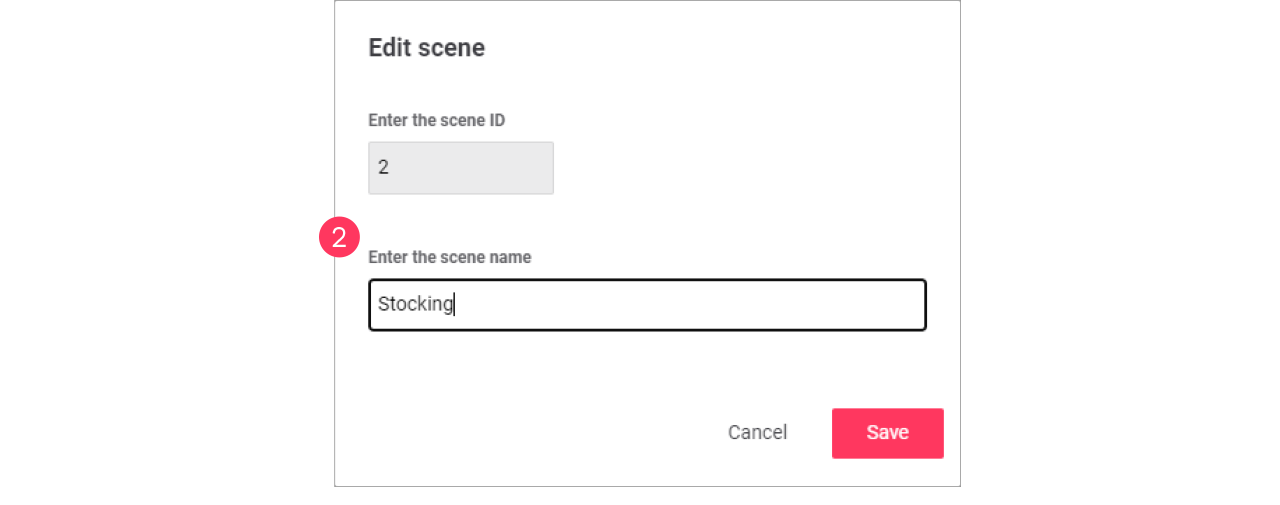
Edit a scene
-
With the mouse, in the Scenes column, click the Scene to edit.
-
In the Edit scene menu, change the required settings (ID, Name).
Click Save.